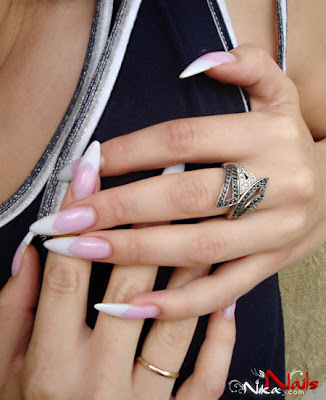
Showing posts with label nail care. Show all posts

care dan loving your nails... because nails can detect your disease...

nail care, nail diseaseTechnique to diagnose the disease is increasingly diverse. Detection of your illness by looking at fingernails discrepancy is also really old way. In addition to passing the examination of blood, feces, and urine, the disease can also be detected by eye, tongue, and even nails. Interpretation of disease through the nails is already done people since the time of Hippocrates.
The main function of nails is to protect the fingertips are soft and full of nerves, and the heightens the touch. In chemistry, the same nail hair, among others, formed from keratin protein that is rich in sulfur.
Nails grow from a soft gel-like cell death, harden, and then formed when starting to grow out of his fingertips. The skin at the base of the nail it functions to protect from dirt.

Good nutrition is very important for nail growth. Conversely, if malnourished or suffering from anorexia nervosa, growth is very slow and brittle nails.

Here are some nail irregularities that can help doctors diagnose a disease:

1. The blue color at the base of the nail indicates lack of good blood circulation and is a symptom of heart disease.
2. If half of the near end nails pink or brown colored white while the epidermis was a symptom of chronic kidney disease.
3. When the resulting horizontal wrinkles and nails look dull, it indicates lack of nutrition or symptoms of a disease such as measles, chicken pox, mumps, and cardiac conditions such as Reynaud's syndrome (muscle spasms in the fingers and toes due to very cold)
4. Longitudinal red layer of the nail, indicating bleeding in the capillaries. Double lines is a symptom of high blood pressure.
5. If the nail growth seems slow, thick and hard and yellowish, indicating lymphatic disorders or chronic gastrointestinal disease.
6. The emergence of irregular spots on the nails, a sign of disease psoriasis (chronic skin disease).
7. And if excessive curvature at the base of the nail and around the tip of the nail, it marks the symptoms of TB disease, emphysema (lung disorders), cardiovascular disease or liver disease.

If that diagnosis is correct, we should be diligent attention to any changes in nail growth for the disease more quickly detected.
Detection of your illness by looking at fingernails gaffe. When you see your nails like the list above segerlah consult your doctor.
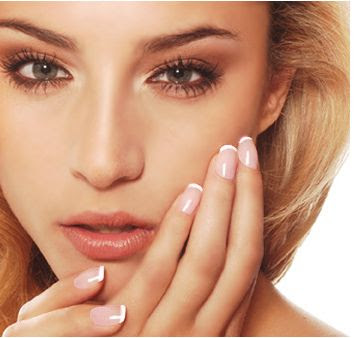
nail care - yellow nails and how to prevent ...

nail careNails are part of the body which, although small but very necessary for every human being. Nails protect the soft tissue underneath. Imagine if on every finger you have no nails. You will not be able to do the job comfortably.
For women the nail is of particular concern. They often colors for more beautiful nails. Even make special care of their nails. But there are other benefits that we can get just by looking at the color or condition of our nails.
Nail color can reflect the general health and lifestyles and habits of nail care. Anyone who is concerned about the discoloration of the nails If you want to see the health condition of yourself, try to observe the signs that exist on your nails. Healthy nails will be colored pink. When they appear white or yellow spots then it is a sign that your health is not good.

What Causes Yellow Nails and how to prevent

1. smoking

Perhaps the most common causes of yellow nail smoking. For years, heavy tobacco use, both finger nails and skin can become stained yellow or yellowish-brown by the nicotine and tar in cigarette smoke.
The best way to remove these stains - and gain many other health benefits - is to stop smoking. If the stop is not possible, staining may be reduced by placing a cigarette in an ashtray between puffs rather than holding it in your fingers.

2. long used nail polish

Another common cause of yellow nails are long used nail polish. Dark color is applied directly to the nail the most likely cause staining, although the constant use of nail polish anywhere can give a yellowish tinge. This problem can be solved by applying the base coat of clear nail polish under the dark, and periodically leave the nails are not painted to give them "rest".

Removing Yellow Stains

Various home remedies have been proposed to remove yellow stains from nails; These include:

- Soak your nails in fresh lemon juice
- Soak your nails in denture cleaning solution (follow manufacturer's instructions to dissolve the tablets in the water)
- Using a nail whitening pencil to hide stains
- Using a nail buffer to remove stains (excessive buffing ever, as this thin and weaken the nail.)

3. nail fungus infection

nail fungus infection is the most common of all nail disease. Nails or, more generally, the nails may be affected. Infected nails become thick, yellowish in color and crumbly. Infection usually begins at the tip and grow downward until the entire nail is affected. It is impossible to clean itself, so it is important to see a doctor for treatment.

Oral Health Problems medicines prescribed by doctors are generally more effective than topical medications, especially in advanced infection. fungal treatment Over-the-counter is also available, although their effectiveness varies. The following simple steps can help reduce the risk of fungal nail infections.

- Avoid walking barefoot in public places.
- Change socks (preferably cotton) every day.
- Do not share socks or shoes.
- Keep your feet clean and dry them thoroughly after washing, especially between the toes.
- Wear protective gloves for dish-washing and household tasks wet.
- Avoid wearing nail polish and artificial nails, which can trap moisture against the nails and encourage growth of fungi.
- Ensure that the manicure and pedicure tools are clean before use.

Yellow nail syndrome is a rare disorder in which the lymphatic system and chest problems occur together with nail thickening, yellow or yellowish-green. Nails grow slowly and in severe cases can be separated from the nail. A vitamin E ointment or food supplements can improve the appearance of nails affected.

How to Make Your Friends Jealous of Your Nails

nails designs, nail care,  short nailsBy Roxana Popescu It's been said that in the way a woman dresses, shoes are always the smallest detail that makes all the difference. The same thing can be said about nails for the general beauty. You can wear a perfect make-up and have the perfect hair, if your nails are not taken care of, surprisingly, this will be one of the first things to be noticed. On the other hand, even without a great outfit, exceptional beautiful nails will always attract admiration and positive jealousy from women and interest from men. The hands and nails are to be considered one of the sexiest sides of women.
Women's taste is varies al ot in the way they like their nails to be done, short or long, simple or extravagant, plain colored or with special designs. Longer nails are generally considered to be sexier as they seem to somehow make a difference between a girl and a woman. But girly can be sexy also and very long nails are sometimes not quite aesthetic.

No matter the size or the shape, any nail look can be strongly improved by just a couple of simple actions.

1. Always keep your nails clean. Clean the nails and the area under your nails any time it's needed. If using colored nail polish, don't forget to wipe it off and reapply it every time it starts looking not so fresh. Nails with half pealed nail polish look bad and sends the wrong massage.

2. Push back or cut your cuticles every 2-3 days. These procedures make the nail look much cleaner and longer on the finger, uncovering its full aesthetic potential.

Whether you chose to just push the cuticle back or to push them back in order to cut them, do it gently and without putting too much pressure on the nail. Pushing on the nail makes future nail growth wavy.

If you chose to cut them, always do it with a clean, special, thin and sharp scissors, investing allot of care and patience. Wounds look bad for a couple of days and they are also a high risk for the area to get inflamed, or even infected. Also, if you cut them, it's better to do it pretty often, before they get to grow too much. When cutting grown cuticles the remaining of the skin has the tendency to shred and lift in small pieces, an effect that doesn't appear when they are regularly cut.

Use cuticle oil or hand cream at least once a day, nicely rubbing it on the nail area. This makes the cuticles and the skin around the nails softer and more flexible, preventing the skin from lifting and the edges dryness.

3. Use transparent top or colored nail polish on your nails. Even the shortest, simplest nail will look cleaner and better with a transparent nail polish on top. Also, there is a very large range of transparent nail polish type of products that will help you keep your nails healthier. The colored nail polishes are the ones to bring it on though.

We have to admit that, most of the women if not all are fascinated with colors and our nails give us the perfect opportunity to play with them.

The general rule says for short nails more natural colors to be used and sets no limits for the long ones. But not everybody agrees with this rule. Strong colors on short nails are very sexy and states a strong personality. They bring to you the Tomboy style of a tough, sexy woman.

So, in the world of colors, anything is allowed. What to do with so much freedom?

The best of all is one step forward, mixing them and getting an artistic design on your nails.

4. Get a surprising design on your nails.

It always sounds more complicated than it really is. Sometimes, a simple stripe placed in the middle of the nail or a couple of dots arranged in the shape of a flower can make a world of a difference and doesn't take too much of a talent or time. There are also a lot of tools on the market that will help you to achieve such creativity with almost no effort. There are special colors for nail art, more dense and with a narrow brush or a small pipe (like a pen), that offers you a pretty high precision in applying the nail polish colors.

If you want an even more complex design you still don't need to be a specialist to do them, a very easy way is using one of the smART nails design templates. The result looks like you've done it yourself, only with no mistakes, and you are also free to use any of your old nail polishes in the process. It also gives you the freedom of multiple combinations and personal adding.

No matter the method you used in adding the nail art spice to your nails, after you got it all dry, apply a transparent coat on top, to cover and protect your creation.
Article Source: http://EzineArticles.com/?expert=Roxana_Popescu

uv gel nail ...easy and safety - how to application...?

uv nailsThe thickness of the gel layer has a profound effect on cure rate. It is far better to use three or four coats rather than one or two thick coats. thin coat allow much light can penetrate the layer, thus reducing shrinkage. Shrinking is normal, but above 12% causing many problems, such as lifting, cracking and other types of service interruption. Gel shrinking product increased to 20%. Clients can sometimes feel the effects of excessive shrinking, commented that the enhancements may feel 'tight' or complained of throbbing and / or sensation of heat on the nail. These symptoms may occur immediately or up to 24 hours after application, and depends entirely on how much to shrink the gel. Excessive shrinkage is not only unpleasant, it can cause damage or trauma to the nail. Excessive shrinkage can hit the nail plate, causing it to 'pop' free from the song that holds the nail. After the separation has occurred, with easy travel to and infection of the nail plate can occur in the space between the nail plate and nail. Other causes of trauma on-filing, heavy abrasive and high-speed exercise, over-priming or using nails that are too long for the client's life style, activity level and nail plate shape.
Depreciation can be minimized by applying a few, thin layer of gel. Clients with a thin, broken nail plate easily injured by excessive shrinkage and other trauma. Remember, the client pays you to care for their nails first, then give them a wonderful enhancement. Keep natural nail plate and surrounding skin healthy, and they tend not to have problems. Always read, understand and follow the manufacturer's instructions for proper preparation, application, curing and finishing your gel products. The success of this service is entirely up to YOU!

Application Gel (Calgel Using)

Follow the preparation steps that have been described on the page of Artificial Nails. proper preparation prevents problems, so to get it right, do not take shortcuts.

Carefully spoon a small amount of gel into your brush, keep one side clean with a swipe at the edge of the tube.

Apply a thin layer of gel over the entire nail plate starting in the middle of the nail and cuticle work toward gel. Stroke gel in much the same way as the application of polish, pull the brush to the edge of the free. Seal edges free by swiping the brush lightly on the leading edge.

During the application, make sure the brush hairs do outside 'fan' is not. If they do outside of the fan, you apply too much pressure and not quite gel will be left on the nail plate to allow for shrinkage during cure, and the result will be a small 'crater' in which the gel withdrew during the healing process. If this happens, re-apply a thin layer of gel to make sure to apply less pressure. Do not over-work the gel as this will result in air bubbles and / or treating uneven.

Repeat this process on all five fingers. Prior to cure, check your work again to make sure the entire nail plate evenly covered with a thin layer of gel. Check the cuticle and sidewall lines to ensure that no gel touches the skin, and if so, remove them with a stick orangewood. Make sure you have left a small margin all around the cuticle and sidewall line free of product to allow for depreciation of the right and to prevent repeated and long contacts with sensitive skin.

Place the nails under UV light for 3 full minutes to completely cure the gel. Apply a second coat of gel and cure for 3 minutes.

NOTE: With Calgel clear, normal recommended curing time is 1 minute. It will be long enough to get a 'cure' total if you have applied THIN coating. However, to standardize the curing time, 3 minutes to cure both Clear and colored Calgel Calgel.

Remove the hand from the light and clean nails with nail-free cloth to remove saturated with Calguard (or cleanser that comes with your choice of product system). This will remove a layer of sticky 'preserved' in the above enhancements, even nail still will feel slightly tacky normal. Check the nail to the surface even, and the 'crater' if real, apply one thin layer of gel and cure.

Apply the gel into the hands of others following the previous procedure. If you find that the gel a few have touched the hand or cuticle area, delete the file 240-grit and then buff until smooth. Finish by using a sealer (Calcrystal) and nail enamel color of your choice. If the client prefers a permanent French Manicure, use a white gel (Calgel color 01 or SW) to the free edge.